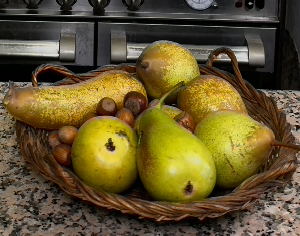
Pear & Hazelnut

This dessert is designed for all hazelnut and praline lovers, elevated by the freshness of pear.
⏱️ Time: 2 hour
🔪 Difficulty: Level 3,5/5
⚠️ Allergens: Nuts, gluten, lactose
⚙️ Options: Gluten-free, lactose-free
| Ingredient | Quantity | Unit |
|---|---|---|
| Preparation 1: Hazelnut Cream | ||
| Milk | 100 | g |
| Hazelnut | 20 | g |
| Praline | 20 | g |
| Egg yolks | 20 | g |
| Sugar | 10 | g |
| Gelatin | 1 | sheet |
| Preparation 2: Pear Sorbet | ||
| Pear cubes | 300 | g |
| Pear juice | 100 | g |
| Honey | 15 | g |
| Granulated sugar | 15 | g |
| Preparation 3: Hazelnut Financier | ||
| Egg whites | 50 | g |
| Brown sugar | 30 | g |
| Flour | 25 | g |
| Ground hazelnut | 35 | g |
| Baking powder | 1 | g |
| Honey | 10 | g |
| Powdered sugar | 15 | g |
| Butter | 18 | g |
| Preparation 4: Hazelnut Praline | ||
| Hazelnut | 100 | g |
| Sea salt | 2 | g |
| Sugar | 100 | g |
| Preparation 5: Poached Pear | ||
| Pear | 1 | pc |
| Orange juice | 100 | g |
| Lime | 10 | g |
| Honey | 30 | g |
| Preparation 6: Sliced Pear | ||
| Pear | 1 | pc |
| Lemon juice | 5 | g |
| Preparation 7: Pear Lemonade | ||
| Pear juice | 200 | g |
| Sparkling water | 150 | g |
| Lemon juice | 10 | g |
| Sugar | 30 | g |
For a gluten-free version, do not add flour to the dacquoise.
| Ingredient | Quantity | Unit |
|---|---|---|
| Preparation 1: Gluten-Free Financier | ||
| Egg whites | 50 | g |
| Brown sugar | 30 | g |
| Corn flour | 25 | g |
| Ground hazelnut | 35 | g |
| Baking powder | 1 | g |
| Honey | 10 | g |
| Powdered sugar | 15 | g |
| Hazelnut praline | 15 | g |
| Butter | 18 | g |
| Ingredient | Quantity | Unit |
|---|---|---|
| Preparation 1: Lactose-Free Financier | ||
| Egg whites | 50 | g |
| Brown sugar | 30 | g |
| Flour | 25 | g |
| Ground hazelnut | 35 | g |
| Baking powder | 1 | g |
| Honey | 10 | g |
| Powdered sugar | 15 | g |
| Hazelnut praline | 15 | g |
| Oil | 18 | g |
| Preparation 2: Lactose-Free Hazelnut Cream | ||
| Hazelnut milk | 100 | g |
| Hazelnut | 20 | g |
| Hazelnut praline | 20 | g |
| Egg yolks | 20 | g |
| Sugar | 10 | g |
| Gelatin | 1 | sheet |
I advise you to toast your hazelnut powder at 150°C for 15 minutes to compensate for the lack of taste usually provided by hazelnut butter.
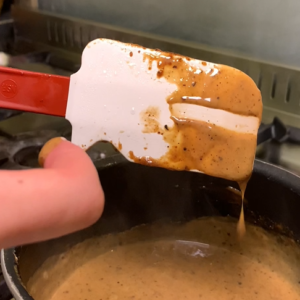
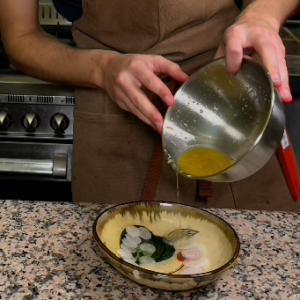
Step 1: Hazelnut Cream
- Infuse the heavy cream with the hazelnuts for at least 15 minutes. Strain and reweigh the cream.
- Add the praline, then heat the mixture.
- Rehydrate the gelatin in cold water.
- Vigorously mix the egg yolks with the granulated sugar. Pour the hot praline cream over the mixture and stir well.
- Put it back on the heat and cook to 82°C (179.6°F), stirring in a figure-eight motion with a spatula.
- Stop the cooking process by adding the gelatin and ensure it is fully dissolved by mixing thoroughly.
- Chill in the refrigerator at 4°C (39.2°F) for at least 2 hours.


Congratulations, step 1 is completed ! Let’s continue !
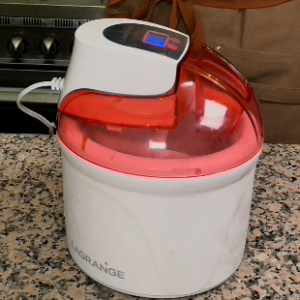
Step 2: Pear Sorbet
- Prepare the pears. Juice some of them. Dice the other half.
- Pour the sugar and honey into the bottom of a non-stick saucepan, add the pears and juice. Cover and simmer until caramelized.
- Mix the mixture and strain it. If you wish, you can add a strong alcohol, preferably pear. Then add 5% alcohol compared to the total mass of the mixture.
- Leave to cool to 4 ° C. Transfer to your ice cream maker, smooth, then set aside until use.
I advise you to do this step as late as possible. An ice cream is always better just after coming out of the machine and its texture is easier to work with.

Step 3: Hazelnut praline
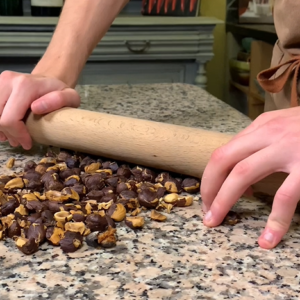
- Roast the hazelnuts for 20 minutes at 155°C. Remove them from the oven and crush them with a rolling pin to make mixing easier. Keep the hazelnuts warm in the oven and prepare your syrup.
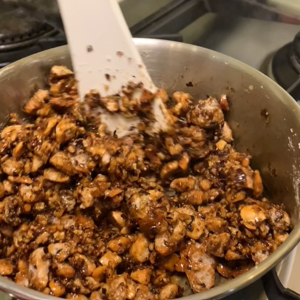
- Put the water and sugar (in this order) in a saucepan. Cook this syrup to 115°C, then turn off the heat and add the hot hazelnuts. Start mixing from the outside to the inside, from bottom to top, to coat the hazelnuts with syrup.
- Return the pan to the heat and continue cooking, stirring until caramelized. The more you cook, the less sweet your praline will be.
- Once cooked, spread the praline on a silpat or baking sheet. Sprinkle with the fleur de sel. Let cool to room temperature and keep a few hazelnuts for serving.
- Put the rest in a blender. If you are worried about your blender, you can add a little neutral or peanut oil to make it easier to mix.
- Blend until you get a spreadable texture and set aside at room temperature.
You can add other oilseeds like almonds or let your imagination run wild and mix! However, it is important to respect a high oil fat content.


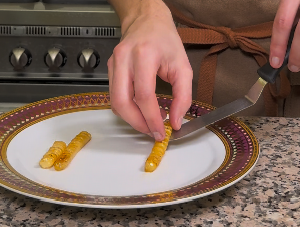
Step 4: Hazelnut financier
Don't worry, this type of cake is called: "the foolproof one"!
- Preheat your oven to 170°C.
- Mix all the powders with your egg whites and mix until you get a smooth paste. Add the honey and praline, then mix everything together.
- Cook your butter. To know when the butter becomes "hazelnut", you have to wait until it browns and stops "singing". Pass it through a sieve, then pour it gently onto your previous mixture while mixing.
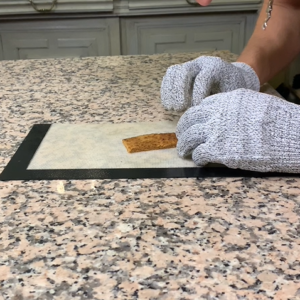
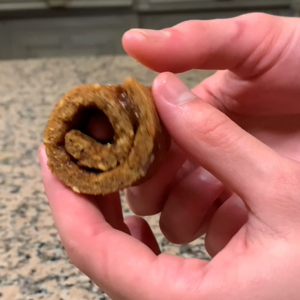
- Spread this biscuit on a silicone mat in a layer 3 mm thick. Bake for 9 minutes and check the cooking. As soon as the biscuit is cooked, cut strips 3.5 cm wide and roll your biscuit while still hot. Let it set by placing the rolled-up on the joint to prevent it from opening again.
Well done for this step, let's move on to the next one!
The biscuit must be warm; if it is cold, it may break.


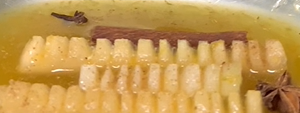
Step 5: Poached pear
- Preheat your oven to 155°C in fan mode.
- Peel the pears and core them using an apple corer. Use this apple corer to make pear cylinders. Personally, for one person, I make two 10 cm cylinders and one 6 cm cylinder. Cut the cylinders by making cuts cutting 2/3 of the way up. There should be enough space to then arrange slices of raw pear inside.
- Mix the rest of the ingredients and pour them into an ovenproof dish. Dip the cut cylinders into the sauce and bake for at least 20 minutes.
- To check if they are cooked, insert a knife: there should be very little resistance. Keep the sauce for the rest of the recipe.
- You can leave the pears in your switched-off oven to keep them at temperature.
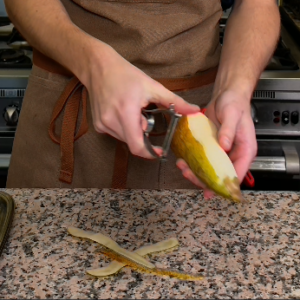


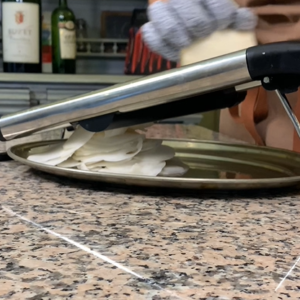
Step 6: Sliced Pears
- Peel your firmest pears and use a mandolin. Cut into thin slices. Watch your fingers!
- If you don't have a mandolin, you can do this step with a sharp knife.
- Using a cookie cutter, cut these slices into circles of different sizes. Personally, I use a 2 mm circle and another 3 mm.
- Dip these slices in a mixture of lime juice and zest.
Step 7: Pear Lemonade
Put your pears in the juicer to collect the juice. Mix it with the sparkling water, sugar and lemon juice. SHAKE! Refrigerate for at least 2 hours, ideally leaving it overnight.
Congratulations, you have completed the whole recipe! All you have to do now is plate and treat your guests! 😊
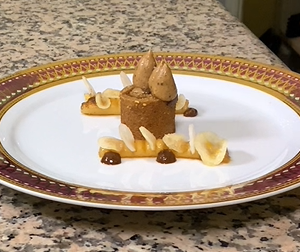
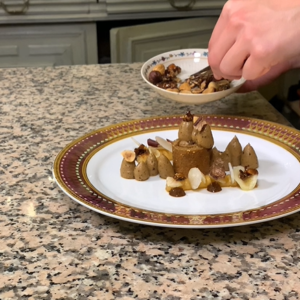
Plating Suggestion
- Remove the pears from the oven and drain them. Arrange them parallel to each other. Pipe a dot of praline in the center of your plate.
- Place your rolled financier on the praline dot and fill the hole with praline and cream. Using a 14mm nozzle, pipe three dots on half of the available space on top of your financier. Insert raw pear slices into the gaps of your poached pears, alternating sizes.
- Pipe the remaining cream on the plate in a staggered pattern. Arrange caramelized hazelnuts and dots of praline.
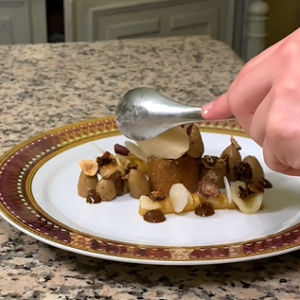
- When ready to serve the desserts to your guests, place a quenelle of ice cream on the other half of the rolled financier. If you're not skilled in making quenelles, a scoop of ice cream can also provide an appealing look. Finish the plating with a few herbs or flowers to add a fresh, botanical touch.


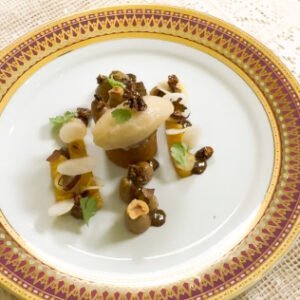
I’d like to congratulate you and thank you for trying to reproduce this recipe. I hope you are satisfied with the result 🙂
Chef Vico